Work in Progress Wednesday
Hi, my name is Logan, you may recognize me by my discord handle Redrix-3. Today I'll be sharing the progress I have made on a project I "finished" over a year ago, but I have decided to revisit.
The initial idea was based off of a classic TY7 Devilfish image:

And here is the progress it had been left in after I stopped working on it:

Not too bad, but compared to my more recent painting projects I felt as if it didn't live up to the standards. Luckily as I had already started to do more airbrush work when I did the white coat I was content with that. The main issues I had were with all of the other colors present on the vehicle, as well as that the side door and Fire Warrior jumping out kept breaking off.
Paints used

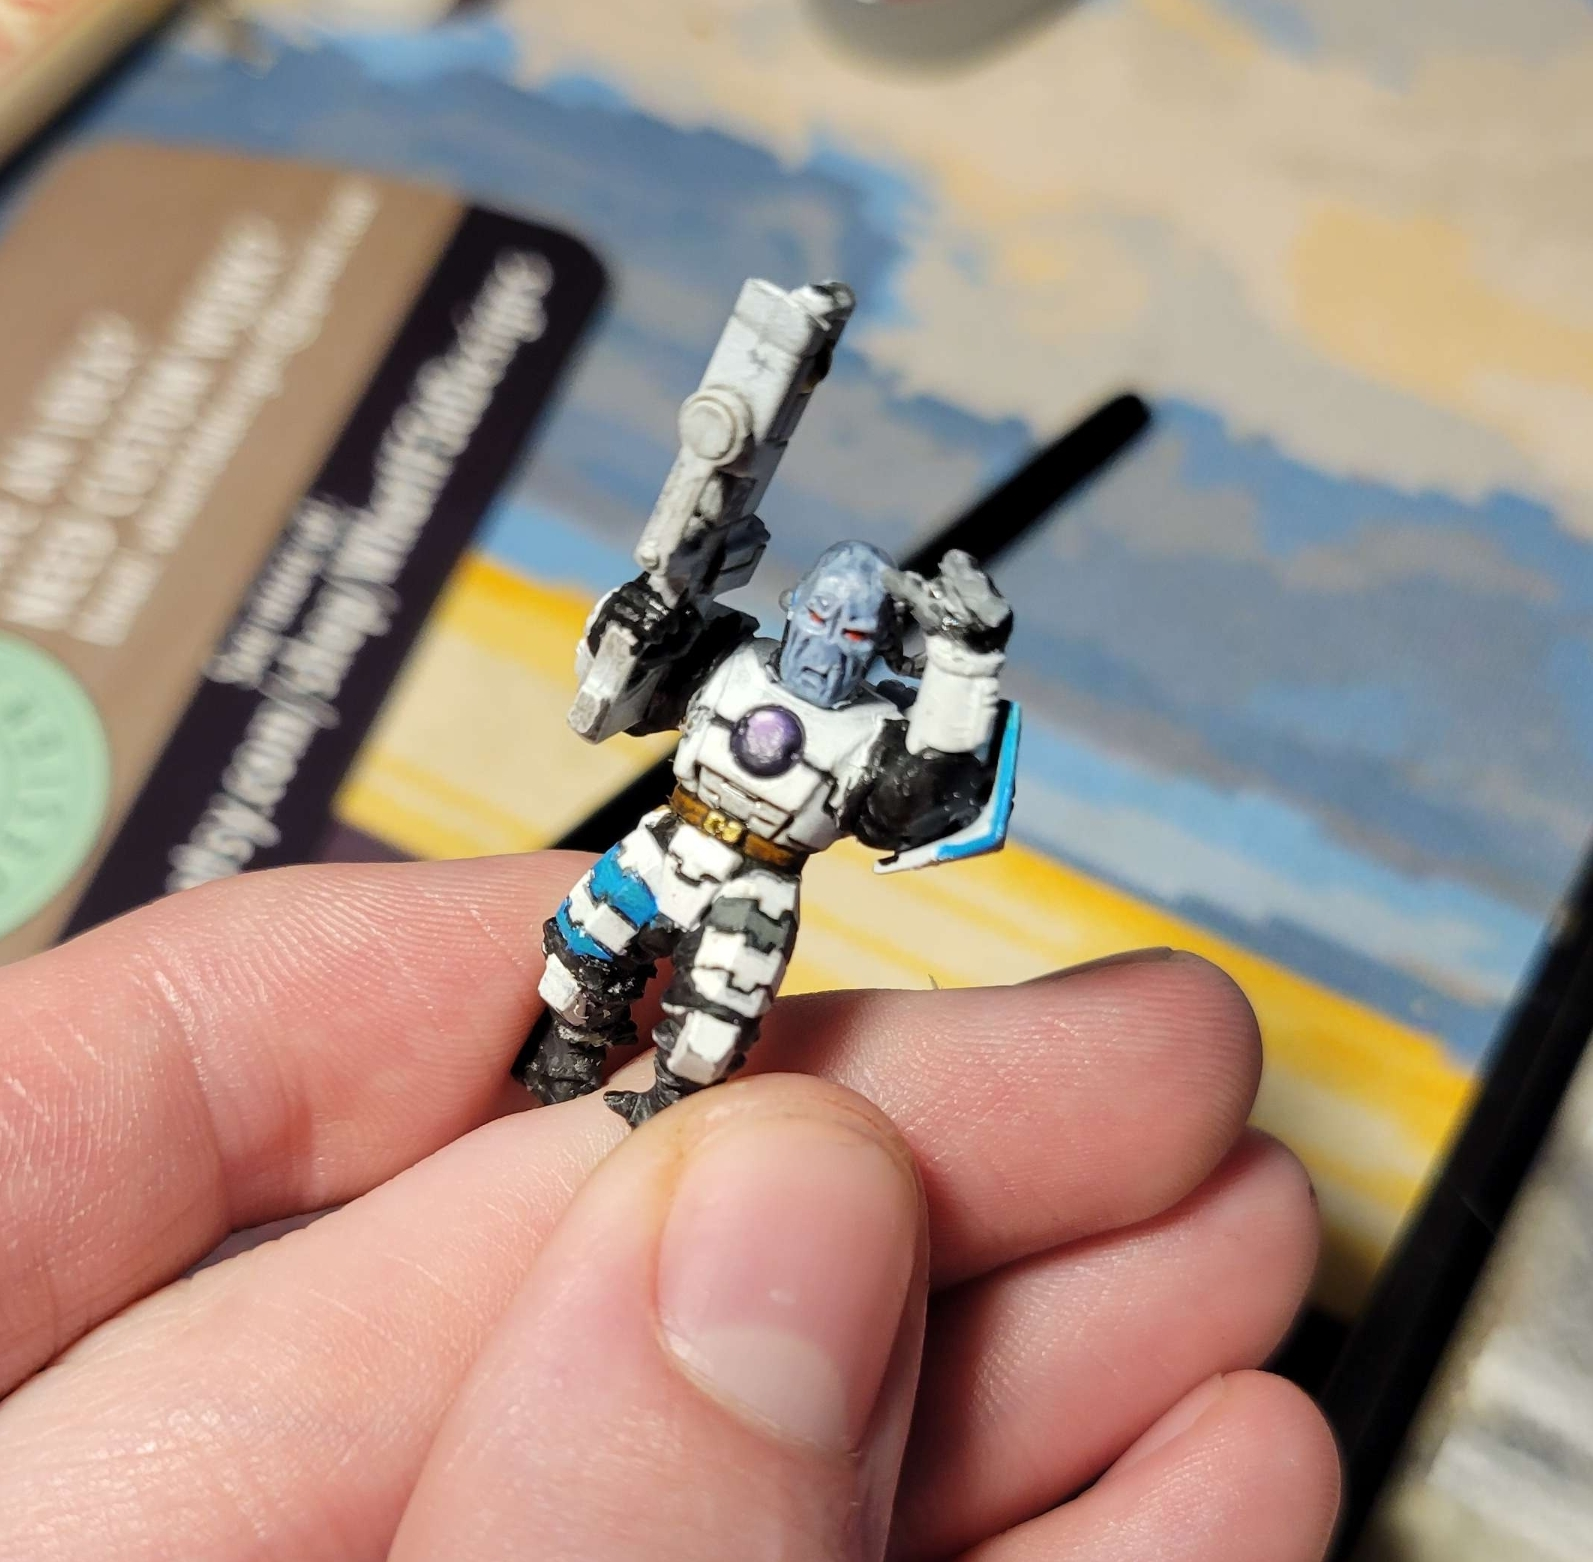
Back to the models, my first steps were to get the door pinned into place, and fix the ankles of the FW as they had a little greenstuff work.

He's just saying hello!
So he got a new coat of paint to touch up his armor panels and actually give him a leather belt. Also as I was going to change the direction the model would be lit from for highlights, I adjust the brightest spots on his chest and legs. Unfortunately his antenna is still missing, but that is an easy fix for another time. WIP of course!
Next up was revamping the front window, here is me selecting the entry point for the light:

Little bit of specular (I believe that's the term) highlight and it is looking much better! I know a lot of fancy painters will do wet blending for something like this, but I can never get it to look right so I instead just mix a bunch of in-between colors for each step and use that to soften the borders between each color.
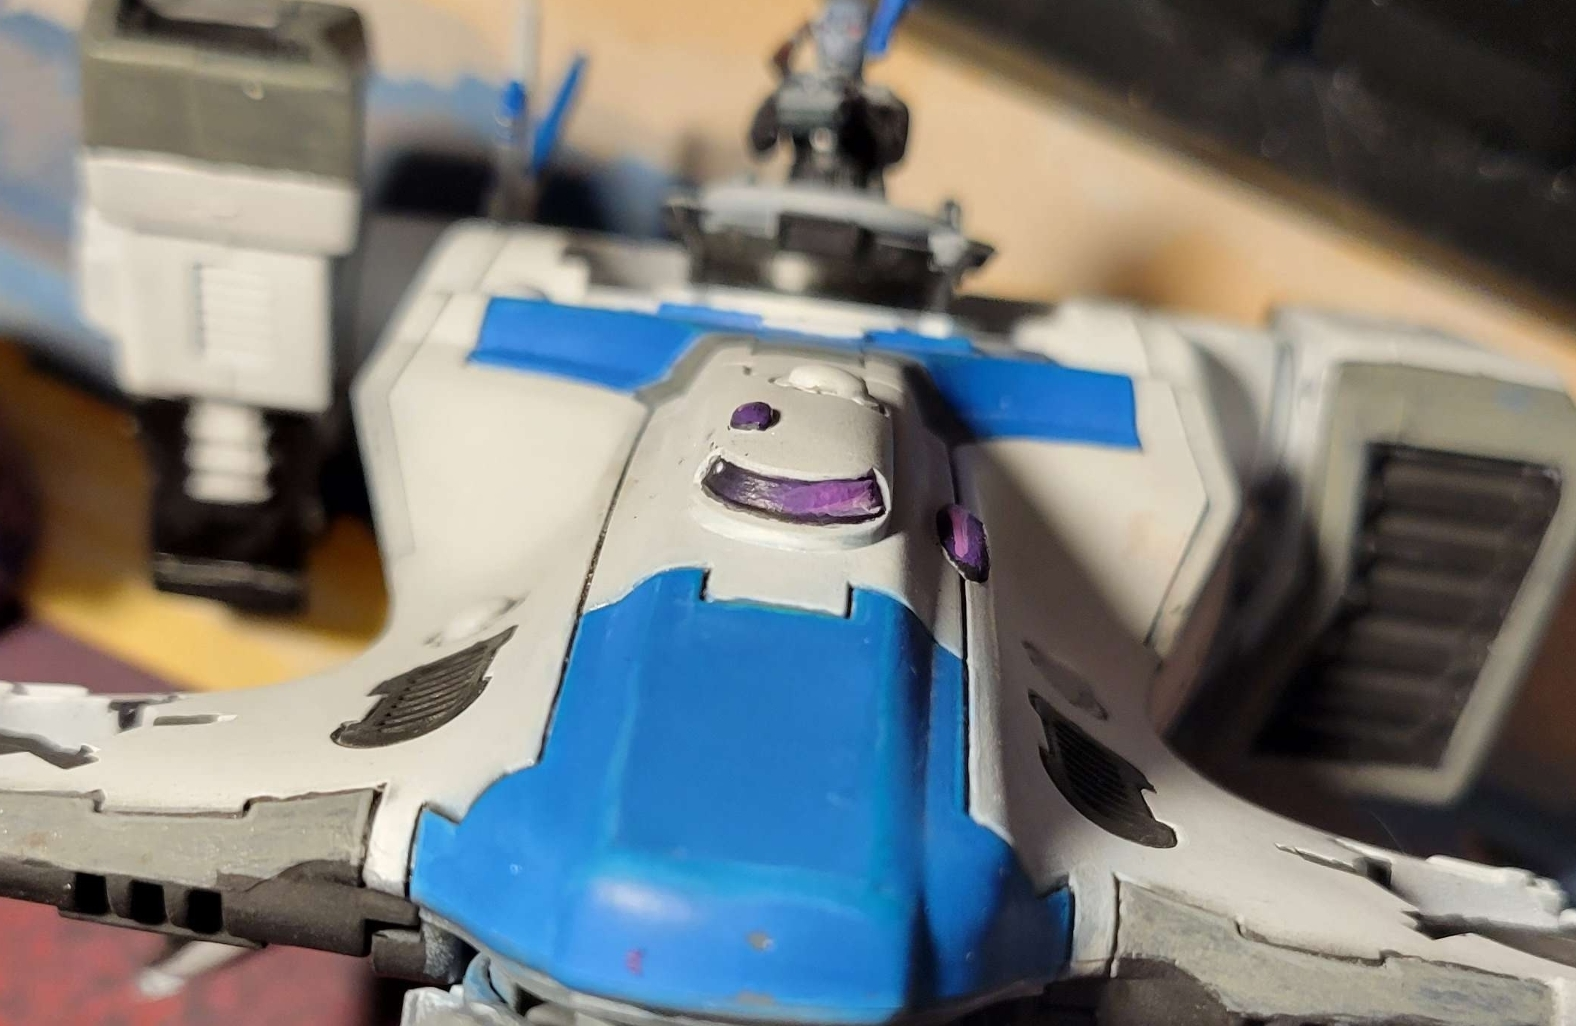
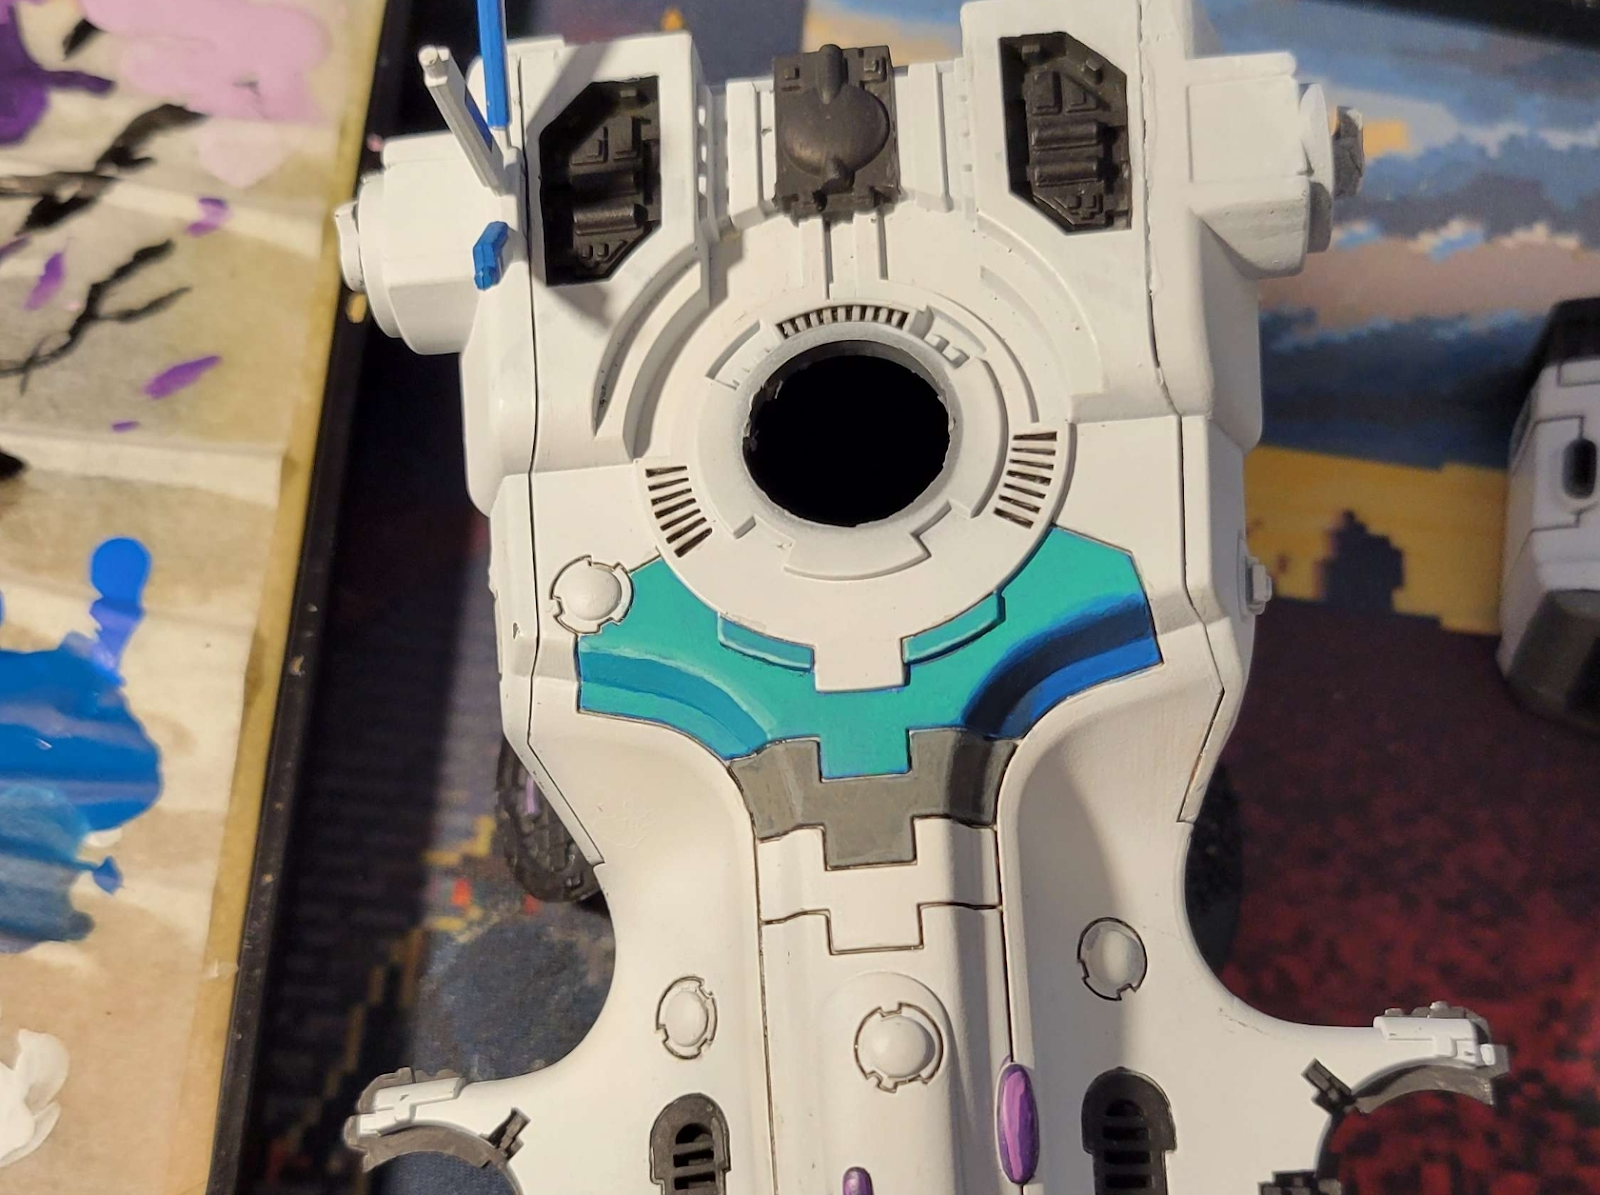
Now moving onto the blue armor plates, I wanted to make them more in line with the jade green of Bork'an. So with the green turquoise and a shade I had made using Pro-Acryl Blue, Green Turquoise, and Lamp Black, I blocked out the sections and colored them in! I also filled in the drone ports with lamp black to help distinguish them from the rest of the chassis.

At this point I did get a little distracted and did not come back to the front blue panel until the very end, so we will come back to that.
No more sloppy freehand!
Throughout the project I also added more and more extremely thin white layers to cover up some freehand I was unhappy with.
Now I moved onto the back of the chassis, which had absolutely zero paint besides the base coat. I picked out the back hatch and lit up the "brake" lights with a big glob of Tesseract Glow. It really made them pop out from the black of the inlay. I also did some light dry brushing on those X's on each side, as well as the front portions of the engines and the top technical panels. There was an attempt to place a Tau symbol in the center of the door, but either I have a skill issue or the transfers were just too old and they did not want to stick at all. So I just dropped that idea and moved on.

Now back to the front of the chassis, I finally went back to the blue panel as well as the grey panels. They got the same treatment with shades and highlights to match.

I used to use craft paints for the grey as well, but I ran out and could never find a color match to what I had. Funnily enough the Citadel versions cover just about as well as them (Not great). I am unsure as to what specifically makes those lighter greys cover so poorly but it seems it is not just the cheap paints either.
With all of those panels done, this project is sitting at about 90% done. I still have the drones to clean up, greebles to paint, and small details to touch up. Each door has a window, and the back one has two of course. The Tau sitting in the top hatch is also sitting off to the side as I still have touch ups to do there. For now though, it is definitely more than up to par with my other projects and is ready for the Free State GT this weekend!

(Before)

(After)

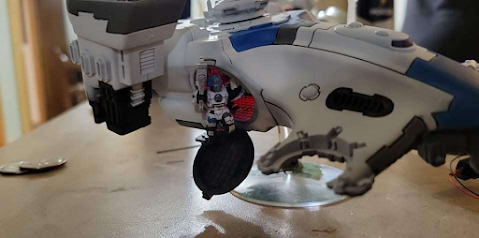
Also while I will probably not do much painting on the inside, I'm sure you noticed the red glow.

That my friends is a nano LED, and I have the switch conveniently placed on the bottom.

It almost looks like a greeble!
It helps really add some spice to the project. I bought them from Evan Designs and you can find them here. We're not sponsored, they're just really amazing products.

He's more than ready to serve.
I still have a lot to touch up with this project, so hopefully soon I can present the final project!
- Logan


No comments:
Post a Comment